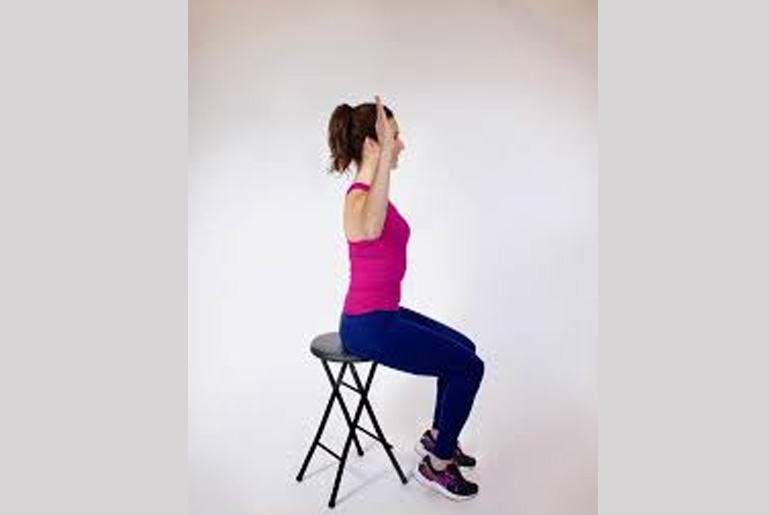
Maintaining a healthy and active body requires incorporating exercises into your routine to counter the effects of prolonged sitting and address changes in posture. Spending hours in a chair can lead to muscle stiffness, particularly in the shoulders, causing them to bend forward and impacting everyday tasks. To alleviate these issues, including specific exercises in your routine is essential. Shoulder blade squeezes, neck stretches, thoracic extension, chest opener stretch, cat-cow stretch, chin tucks, and Brugger’s postural relief exercise are beneficial for stretching muscles, improving flexibility, and enhancing posture. Regularly practicing these exercises can help alleviate stiffness, prevent cramps and pain, and contribute to overall well-being, ensuring a healthier and more active lifestyle.
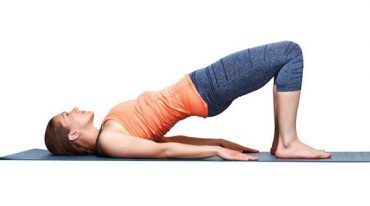
1. Glute Bridge Exercise:
Instructions:
- Lie down on your back on a yoga mat with your knees bent and feet hip-width apart. Place your arms straight by your sides with your palms facing down.
- Ensure that your feet are flat on the mat, and your heels are a comfortable distance from your hips.
- Inhale deeply and engage your core muscles.
- Exhale as you press through your heels, lifting your hips towards the ceiling.
- Continue lifting your hips until your thighs and torso form a straight line, and your body resembles a bridge.
- Squeeze your glutes at the top of the bridge to maximize the engagement of the muscles.
Hold the bridge position for 30 seconds to 1 minute, maintaining steady breathing.
- Inhale as you lower your hips back down to the mat.
Tips:
- Keep your feet parallel and hip-width apart throughout the exercise.
- Avoid arching your lower back excessively; engage your core to maintain a neutral spine.
- Focus on using your glutes and hamstrings to lift your hips, rather than straining your lower back.
- Keep your neck relaxed and avoid tensing your shoulders.
Benefits:
- Strengthens the glutes, hamstrings, and lower back muscles.
- Improves pelvic and hip muscle strength.
- Enhances stability and posture.
- May help reduce lower back pain and discomfort.
Incorporate the Glute Bridge into your regular exercise routine to build strength in the posterior chain muscles and promote overall lower body health. As always, listen to your body, start with a comfortable duration, and progress gradually to avoid strain or injury. If you have any health concerns or conditions, consult with a fitness professional or healthcare provider before incorporating new exercises.
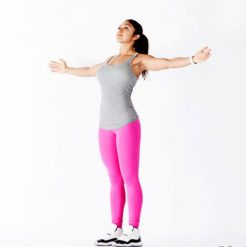
2. Chest Opener Exercise:
Instructions:
- Stand on a yoga mat with your feet hip-width apart, maintaining good posture.
- Relax your shoulders and let your arms hang by your sides.
- Inhale deeply, and as you exhale, start to bring your arms behind you.
- Straighten your arms and interlace your fingers behind your back.
- If interlacing your fingers is challenging, you can use a yoga strap, belt, or towel to bridge the gap between your hands.
- Once your hands are clasped or holding onto the strap, lift your chest and open your shoulders by squeezing your shoulder blades together.
- Slowly start to lift your interlaced hands or the strap away from your lower back, allowing your chest to expand and your shoulders to open.
- Keep your head in a neutral position or gently tilt it backward, looking up toward the ceiling.
- Hold the chest opener position for 30 seconds to 1 minute, breathing deeply and maintaining a comfortable stretch.
- To release, slowly lower your arms and bring them back to your sides.
Tips:
- Focus on keeping your shoulders away from your ears during the exercise.
- Engage your core muscles to support your spine.
- If you experience any pain or discomfort, ease out of the stretch and modify the position.
Benefits:
- Stretches the chest, shoulders, and front of the body.
- Improves posture by counteracting the forward-leaning position.
- Relieves tension and stiffness in the upper body.
- Promotes flexibility in the shoulders and improves range of motion.
Incorporating chest opener exercises into your routine, especially if you have a sedentary job with prolonged sitting, can help counteract the effects of poor posture and reduce discomfort in the shoulders and upper back. Remember to perform the exercise with proper form and listen to your body, making adjustments as needed. If you have any existing health concerns or injuries, it’s advisable to consult with a healthcare professional or fitness expert before starting a new exercise routine.
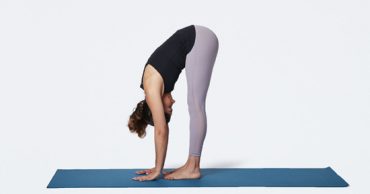
3. Forward Fold Exercise:
Instructions:
- Start by standing on a yoga mat with your feet hip-width apart, maintaining good posture.
- Relax your shoulders and let your arms hang by your sides.
- Inhale deeply, lengthening your spine.
- As you exhale, slowly begin to bend forward from your hips, keeping your back straight.
- Reach your hands towards the ground. Depending on your flexibility, your hands may touch the ground, rest on your shins, or grasp your ankles.
- Allow your head and neck to relax, and avoid rounding your back excessively.
- If comfortable, you can deepen the stretch by gently pulling your torso closer to your thighs.
- Take a deep breath in and exhale slowly while in the forward fold position.
- Hold the stretch for 15-30 seconds, gradually increasing the duration as your flexibility improves.
- To come out of the forward fold, engage your core muscles and slowly roll up, one vertebra at a time, to a standing position.
Tips:
- Keep a slight bend in your knees if you feel tightness in your hamstrings.
- Focus on lengthening your spine rather than rounding your back.
- Relax your neck and let your head hang naturally.
- Breathe deeply and consciously during the stretch.
Benefits:
- Stretches the hamstrings, lower back, and calves.
- Relieves tension in the spine and lower back.
- Promotes flexibility in the hips and hamstrings.
- Calms the mind and may help reduce stress.
By incorporating forward fold exercises into your routine, you can improve flexibility, reduce muscle tightness, and work towards better posture. However, it’s important to listen to your body and avoid overstretching, especially if you have any pre-existing conditions or injuries. If in doubt, consult with a fitness professional or healthcare provider before starting a new exercise regimen.
4. High Plank Pose:
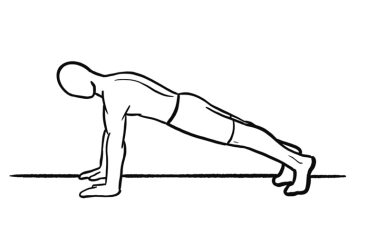
Instructions:
- Start in a tabletop position on a yoga mat with your hands directly under your shoulders and your knees under your hips.
- Ensure your wrists are aligned with your shoulders, and your fingers are spread wide for stability.
- Inhale deeply, engage your core muscles, and lift your knees off the mat, straightening your legs.
- Your body should form a straight line from your head to your heels. Avoid arching your back or letting your hips sag.
- Keep your neck in line with your spine, looking down at the mat to maintain a neutral spine.
- Press through your palms, distributing your weight evenly between your hands.
Engage your abdominal muscles, squeeze your glutes, and maintain a strong and stable plank position.
- Hold the high plank for as long as you can maintain good form. Beginners can start with shorter durations and gradually increase over time.
- Exhale as you release back down to the tabletop position.
Tips:
- Keep your shoulders away from your ears and your elbows slightly bent.
- Focus on keeping your body in a straight line, avoiding any excessive arching or sagging.
- Engage your core throughout the exercise to protect your lower back.
- Breathe steadily and avoid holding your breath.
Benefits:
- Strengthens the core, shoulders, arms, and legs.
- Improves overall body stability and balance.
- Enhances endurance and stamina.
- Promotes a healthy posture.
Performing high plank regularly can indeed help strengthen various muscle groups, increase flexibility, and improve overall mobility. As with any exercise, it’s important to listen to your body, start with modifications if needed, and progress gradually. If you have any health concerns or conditions, consult with a fitness professional or healthcare provider before incorporating new exercises into your routine.
Disclaimer:
The information contained in this article is for educational and informational purposes only and is not intended as a health advice. We would ask you to consult a qualified professional or medical expert to gain additional knowledge before you choose to consume any product or perform any exercise.

