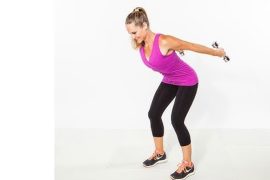
Biceps workouts typically involve exercises that target the biceps brachii and surrounding muscles, aiming to strengthen and sculpt the arms. Effective exercises include barbell curls, which involve curling a barbell towards the chest while keeping the elbows close to the body, dumbbell hammer curls that target both the biceps and brachialis muscle with a neutral grip, preacher curls to isolate the biceps while minimizing swinging, concentration curls to focus on individual biceps with a seated position, and incline dumbbell curls for varied angle targeting.
By incorporating a mix of these exercises into a routine, individuals can effectively work their biceps from different angles and stimulate muscle growth for well-rounded arm development. It’s crucial to maintain proper form, gradually increase resistance, and allow for adequate rest between workouts to optimize results and minimize the risk of injury.
1. Wall handstand:
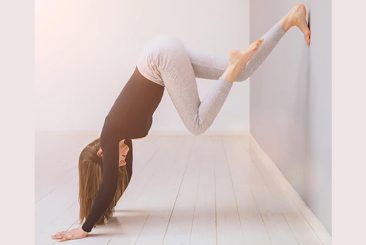
Performing a wall handstand can be a fun and challenging way to build upper body strength and balance. Here’s a step-by-step guide on how to do it correctly:
Starting Position:
- Stand a few feet away from a sturdy wall, ensuring you have enough space to kick up into the handstand position without hitting any obstacles.
Hand Placement:
- Bend at the waist and place your hands on the ground shoulder-width apart, fingers spread wide for stability.
- Your hands should be positioned slightly in front of your shoulders to allow room for your body to come into alignment.
Feet on the Wall:
- With your hands firmly planted on the ground, kick your legs up one at a time, pressing the soles of your feet against the wall.
- Keep your arms straight and your shoulders stacked over your wrists as you kick up.
Walking Up the Wall:
- Once your feet are on the wall, begin to walk your feet up the wall while simultaneously pushing through your hands to lift your hips and torso.
- Keep your core engaged and your body in a straight line from your wrists to your hips and heels.
Alignment and Balance:
- Continue walking your feet up the wall until your arms are straight above your head, and your body is perpendicular to the ground.
- Your hands should be pressing firmly into the ground, and your toes should be lightly touching the wall for balance.
- Maintain a tight core and engaged glutes to help stabilize your body in the handstand position.
Hold and Challenge:
- Challenge yourself to hold the handstand position for as long as you can, focusing on maintaining proper alignment and balance.
- Keep your gaze focused between your hands to help with balance and stability.
- As you gain strength and confidence, you can experiment with different variations, such as bringing one leg off the wall or practicing handstand push-ups.
Safety and Progression:
- Practice near a padded surface or with a spotter until you feel comfortable with the movement.
- If you’re new to handstands, you can start by practicing against a wall to build strength and confidence before attempting freestanding handstands.
Remember to listen to your body and progress at your own pace. Consistent practice and patience will help you improve your wall handstand technique over time.
2. The breakdancer:
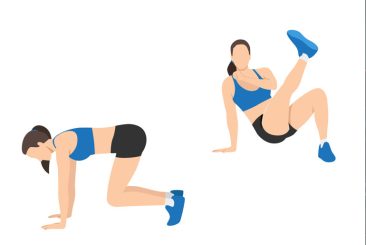
The breakdancer is indeed a challenging and dynamic exercise that targets multiple muscle groups, including the biceps and abs. Here’s a detailed guide on how to perform it correctly:
Starting Position:
- Begin by sitting on the floor with your legs extended straight out in front of you.
- Place your palms on the ground beside your hips with your fingers pointing towards your feet.
- Your arms should be fully extended, supporting your upper body weight.
Lift and Support:
- Press down firmly with your palms to lift your body off the floor, raising your hips as high as you can.
- Engage your core muscles to stabilize your body in this elevated position.
Leg Swing – Part 1:
- Begin the leg swing motion by swinging both legs around to one side of your body in a circular motion.
- As your legs swing around, lift the palm of your hand on that side to allow your legs to pass behind you.
Leg Swing – Part 2:
- Continue the circular leg swing motion by swinging your legs around to the opposite side of your body.
- Lift the palm of your hand on the opposite side to allow your legs to pass in front of you.
- Your legs should now be back in the starting position, but on the opposite side.
Repeat and Speed:
- Continue to repeat the leg swing motion from side to side as quickly as you can while maintaining control and balance with your arms.
- Focus on maintaining proper form and engaging your core muscles throughout the exercise.
Breathing:
- Breathe steadily and rhythmically throughout the exercise, exhaling as you exert effort during the leg swings and inhaling during the transitions.
Repetitions:
- Aim to perform the breakdancer exercise for a specific duration or number of repetitions, depending on your fitness level and goals.
- Start with a manageable pace and gradually increase speed as you become more proficient.
The breakdancer exercise not only targets the biceps and abs but also engages the shoulders, chest, and hip flexors. It’s essential to warm up adequately before attempting this exercise and to listen to your body to prevent injury. As with any new exercise, start slowly and focus on mastering the movement pattern before increasing intensity or speed.
3. Curls:

Curls are an excellent exercise for targeting the biceps. Here’s a step-by-step guide on how to perform them correctly:
Starting Position:
- Stand up straight with your feet shoulder-width apart and your head facing forward.
- Hold a dumbbell in each hand or use improvised weighted objects such as water bottles or cans.
- Allow your arms to hang straight down by your sides with your palms facing forward.
Engage Core:
- Engage your core muscles by drawing your navel towards your spine.
- Maintain a straight back throughout the exercise, avoiding any arching or rounding of the spine.
Curling Movement:
- Keeping your elbows close to your sides, slowly curl the weights upwards towards your shoulders.
- Rotate your palms upward as you lift the weights, so they face towards your shoulders at the top of the movement.
- Focus on contracting your biceps as you lift the weights, ensuring they do the majority of the work.
Full Contraction:
- At the top of the movement, your forearms should be vertical, and the weights should be close to your shoulders.
- Squeeze your biceps at the top of the movement to maximize muscle engagement.
Lowering Phase:
- Slowly lower the weights back down to the starting position, maintaining control throughout the descent.
- Keep your elbows close to your sides and avoid swinging or using momentum to lift the weights.
Repeat:
- Repeat the movement for the desired number of repetitions, maintaining proper form and controlled movements throughout.
- Aim for a full range of motion, ensuring you fully extend your arms at the bottom of each repetition and achieve a complete contraction of the biceps at the top.
Breathing:
- Exhale as you lift the weights (during the concentric phase) and inhale as you lower them (during the eccentric phase).
- Focus on breathing steadily and rhythmically throughout the exercise.
Rest and Recovery:
- Take adequate rest between sets to allow your muscles to recover before performing additional sets.
- Incorporate curls into your regular workout routine to strengthen and sculpt your biceps effectively. Adjust the weight of the dumbbells as needed to ensure you’re challenging yourself while maintaining proper form.
4. Chin-ups:
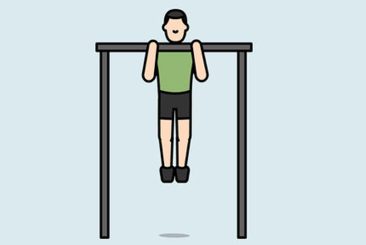
Chin-ups are indeed a fantastic variation of pull-ups that emphasize the biceps more.Here’s a step-by-step guide on how to perform them correctly:
Grip and Hand Placement:
- Approach the pull-up bar and grasp it with an underhand grip, with your hands slightly closer than shoulder-width apart.
- Ensure your palms are facing towards you (backward grip).
- Your arms should be fully extended, and your body should be hanging freely beneath the bar.
Engage Core and Hang:
- Engage your core muscles to stabilize your body.
- Hang from the bar with your arms fully extended and your shoulders relaxed.
- Maintain a slight bend in your elbows to avoid locking them out completely.
Initiate the Pull:
- Pull yourself upward by driving your elbows down towards the ground.
- Focus on engaging your biceps and upper back muscles as you pull yourself towards the bar.
- Keep your chest lifted and aim to bring your chin towards the bar.
Chin Over Bar:
- Continue pulling until your chin passes over the bar.
- Maintain control throughout the movement, avoiding swinging or kipping motions.
Hold and Lowering Phase:
- Once your chin clears the bar, hold this position for a brief moment (about two seconds), focusing on maintaining tension in your biceps and upper back.
- Slowly lower yourself back down to the starting position by extending your arms fully.
Control the descent, resisting the urge to drop quickly.
Repeat:
- Repeat the movement for the desired number of repetitions, focusing on maintaining proper form and controlled movements throughout.
- Aim to perform each repetition with full range of motion, pulling until your chin clears the bar and lowering until your arms are straight.
Rest and Recovery:
- Take adequate rest between sets to allow for recovery and to maintain performance quality.
Chin-ups can be challenging, especially if you’re new to them. If you’re unable to perform a full chin-up initially, you can start with assisted variations using resistance bands or a chin-up machine. As you gain strength, gradually decrease assistance until you can perform unassisted chin-ups. Consistent practice and progressive overload will help you improve over time.
5. Pull-ups:
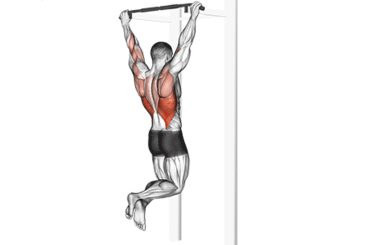
Pull-ups are a fantastic exercise for building upper body strength, particularly targeting the back, arms, and shoulders. Here’s a step-by-step guide on how to perform them correctly:
Grip and Hand Placement:
- Approach the pull-up bar and grasp it with an overhand grip, with your hands slightly wider than shoulder-width apart.
- Ensure your palms are facing away from you (forward grip).
- Your arms should be fully extended, and your body should be hanging freely beneath the bar.
Engage Core and Hang:
- Engage your core muscles to stabilize your body.
- Hang from the bar with your arms fully extended and your shoulders relaxed.
- Maintain a slight bend in your elbows to avoid locking them out completely.
Initiate the Pull:
- Pull yourself upward by driving your elbows down towards the ground.
- Focus on engaging your back muscles, particularly the muscles between your shoulder blades (rhomboids), as well as your biceps and forearms.
- Keep your chest lifted and aim to bring your upper chest towards the bar.
Chin Over Bar:
- Continue pulling until your chin passes over the bar.
- Maintain control throughout the movement, avoiding swinging or kipping motions.
Hold and Lowering Phase:
- Once your chin clears the bar, hold this position for a brief moment (about two seconds), focusing on maintaining tension in your back and arms.
- Slowly lower yourself back down to the starting position by extending your arms fully.
Control the descent, resisting the urge to drop quickly.
Repeat:
- Repeat the movement for the desired number of repetitions, focusing on maintaining proper form and controlled movements throughout.
- Aim to perform each repetition with full range of motion, pulling until your chin clears the bar and lowering until your arms are straight.
Rest and Recovery:
- Take adequate rest between sets to allow for recovery and to maintain performance quality.
Pull-ups can be challenging, especially for beginners. If you’re unable to perform a full pull-up initially, you can start with assisted variations using resistance bands or a pull-up machine. As you gain strength, gradually decrease assistance until you can perform unassisted pull-ups. Consistent practice and progressive overload will help you improve over time.
6. Plank up-downs:
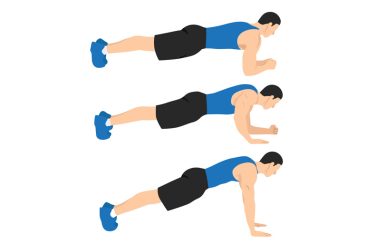
Plank up-downs are an excellent exercise for targeting the core, shoulders, and yes, even the biceps. Here’s a detailed guide on how to perform them correctly:
Starting Position:
- Begin in a plank position with your weight supported on your forearms and toes.
- Your elbows should be directly beneath your shoulders, and your body should form a straight line from your head to your heels.
Upward Movement:
- Straighten one arm at a time, placing your palm flat on the floor directly beneath your shoulder.
- As you straighten your arms, your body will rise into a push-up position, with your arms fully extended and palms flat on the floor.
Push-Up Position:
- Once both arms are straight, you should be in the top position of a push-up, with your body forming a straight line from your head to your heels.
- Keep your core engaged and your hips level to maintain proper alignment.
Downward Movement:
- Lower one arm at a time back to the forearm plank position by bending your elbow and lowering your forearm to the floor.
- Maintain control and ensure that your elbows are directly beneath your shoulders.
Return to Forearm Plank:
- Lower the other arm to return to the starting forearm plank position.
- Your body should now be back in the forearm plank position, with your weight supported on your forearms and toes.
Repeat:
- Repeat the sequence by alternating between straightening one arm at a time into the push-up position and returning to the forearm plank position.
- Continue to cycle through the movements smoothly and controlled.
Plank up-downs can be performed at a moderate pace for strength-building purposes or at a quicker pace to increase the cardiovascular challenge. Focus on maintaining proper form throughout the exercise, especially in keeping your core engaged and your body in a straight line. Start with a manageable number of repetitions and sets, gradually increasing intensity as you become more proficient.
7. Side planks:
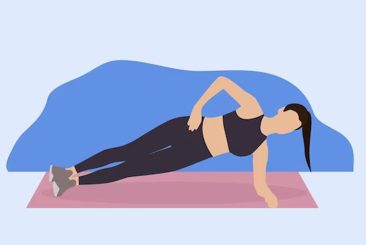
Side planks are excellent for strengthening the core and improving stability. Here’s a step-by-step guide on how to perform them correctly:
Starting Position:
- Begin by lying on your side on an exercise mat or the floor.
- Stack your feet on top of each other and position your body in a straight line from your head to your heels.
- Place your lower elbow directly beneath your shoulder, with your forearm resting on the ground perpendicular to your body.
- Your upper arm can either be resting on your side or extended upward for a more challenging variation.
Engage Core Muscles:
- Engage your core muscles by drawing your navel toward your spine.
- Ensure your hips are lifted off the ground, maintaining a straight line from your shoulders to your ankles.
Lift into Side Plank:
- Press through your forearm and outer edge of your bottom foot to lift your hips off the ground.
- Keep your body in a straight line, avoiding any sagging or twisting at the hips.
- Your body should form a straight line from your head to your heels, with your shoulders, hips, and ankles stacked vertically.
Arm Position:
- Extend your upper arm straight upward toward the ceiling, or place it on your side for additional support.
- Ensure both arms remain straight and aligned, with your shoulders directly above your elbow.
Hold the Position:
- Maintain the side plank position for the desired duration, aiming to hold for at least 30 seconds to start.
- Focus on maintaining proper form and breathing steadily throughout the exercise.
Lowering Phase:
- Slowly lower your hips back down to the starting position with control.
- Rest briefly before repeating the exercise on the other side.
Repeat on Opposite Side:
- After completing the desired number of repetitions on one side, switch to the opposite side and perform the side plank with the same form and duration.
Side planks can be modified to suit different fitness levels by adjusting the duration of the hold or by placing the top foot in front of the bottom foot for added stability. As you become stronger, you can increase the duration of the hold or explore more challenging variations.
8. One-arm push-ups:
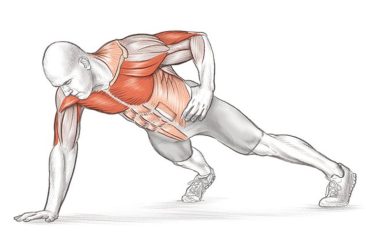
One-arm push-ups are an advanced bodyweight exercise that not only targets the biceps but also engages the chest, shoulders, and core muscles. Here’s a detailed guide on how to perform them:
Starting Position:
- Begin in a standard push-up position, with your hands placed slightly wider than shoulder-width apart.
- Ensure your body forms a straight line from your head to your heels, maintaining a tight core and engaged glutes.
One-Arm Placement:
- Choose one arm and place it behind your back.
- Keep the arm close to your body to maintain balance and stability.
Core Engagement:
- Engage your core muscles to stabilize your body throughout the movement.
- Maintain a straight back and avoid overarching or rounding of the spine.
Lowering Phase:
- Slowly lower your body towards the ground by bending your elbow on the arm that remains in contact with the ground.
- Keep your body parallel to the ground, ensuring proper alignment.
Depth and Hold:
- Lower yourself until your chest is almost touching the ground, maintaining control and stability.
- Hold the bottom position for a brief moment (approximately two seconds), focusing on maintaining tension in your biceps and other engaged muscles.
Pushing Phase:
- Push yourself back up to the starting position by straightening your arm, exhaling as you exert force.
- Keep the movement controlled and avoid jerking or swinging motions.
Repetition:
- Repeat the movement for the desired number of repetitions, focusing on maintaining proper form and controlled movements throughout.
Switching Arms:
- After completing a set with one arm, switch arms and perform the same number of repetitions on the opposite side.
- Ensure proper rest between sets to allow for recovery.
One-arm push-ups require significant upper body strength and stability, so it’s essential to progress gradually and listen to your body. If you’re new to this exercise, you can start by practicing with elevated surfaces or using a stability aid, such as a low bar or a bench, to gradually build strength before attempting full one-arm push-ups.
9. Reverse hand push-ups:
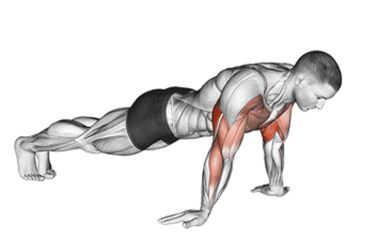
Reverse hand push-ups are an advanced variation that indeed places significant emphasis on the biceps. Here’s a detailed guide on how to perform them:
Starting Position:
- Begin in a standard push-up position with your hands positioned slightly wider than shoulder-width apart.
- Ensure your body forms a straight line from your head to your heels, maintaining a tight core and engaged glutes.
Hand Rotation:
- Slowly rotate your arms outward, away from your body, until your fingers are pointed towards your toes.
- This rotation will place your wrists in a position where your fingers are facing towards your feet rather than your head.
Hand Placement:
- Move your hands a few inches towards your feet, finding a comfortable position where your arms can remain straight.
- Your palms should be flat on the ground, and your fingers should be pointing towards your feet.
Core Engagement:
- Engage your core muscles to stabilize your body throughout the movement.
- Maintain a straight back and avoid overarching or rounding of the spine.
Lowering Phase:
- Slowly lower your body towards the ground by bending your elbows, while keeping them close to your sides.
- Lower yourself until your chest is just above the ground, or as low as feels comfortable given your wrist and forearm flexibility.
Hold and Push:
- Pause for a brief moment (around two seconds) at the bottom of the movement, focusing on maintaining tension in your biceps.
- Push yourself back up to the starting position by straightening your arms, exhaling as you exert force.
Repetition:
- Repeat the movement for the desired number of repetitions, focusing on maintaining proper form and controlled movements throughout.
It’s crucial to approach reverse hand push-ups with caution, especially regarding wrist flexibility and strength. If you experience any discomfort or strain, consider gradually building up wrist flexibility and strength before attempting this exercise again. As with any exercise, start with a manageable number of repetitions and sets, gradually increasing intensity as your strength improves.
10. Diamond push-ups:
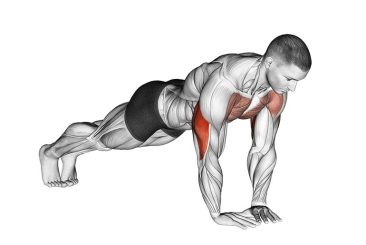
Diamond push-ups are indeed a fantastic variation to target your biceps while still engaging the chest, shoulders, triceps, and core. Here’s a step-by-step breakdown of how to perform them:
Starting Position:
- Begin in a standard push-up position with your hands slightly wider than shoulder-width apart.
- Ensure your body forms a straight line from your head to your heels, maintaining a tight core and engaged glutes.
Hand Placement:
- Bring your hands together directly under your chest so that your thumbs and index fingers form a diamond or triangle shape.
- Your thumbs and index fingers should be touching each other, forming the apex of the diamond shape.
Hand Orientation:
- Rotate your hands slightly inward, about 45 degrees, so that your fingers are pointing towards each other.
- This inward rotation will place more emphasis on your triceps and biceps during the exercise.
Execution:
- Lower your body towards the ground by bending your elbows while keeping them close to your sides.
- Aim to lower yourself until your chest is just above the diamond shape formed by your hands, maintaining a straight back throughout the movement.
- Keep your core engaged to stabilize your body.
Hold and Push:
- Pause for a brief moment (about two seconds) at the bottom of the movement, ensuring full muscle engagement.
- Push yourself back up to the starting position by straightening your arms, exhaling as you exert force.
Repetition:
- Repeat the movement for the desired number of repetitions, focusing on maintaining proper form and controlled movements throughout.
Remember, it’s essential to listen to your body and start with a comfortable number of repetitions and sets. As you become more proficient, you can gradually increase the intensity by adding more reps, sets, or exploring advanced variations.
In conclusion, achieving strong biceps and overall fitness doesn’t always require a trip to the gym. With the right exercises, you can effectively work your biceps and maintain your shape from the comfort of your own home. The ten exercises outlined provide a solid foundation for bicep development. However, for those looking to elevate their home workouts, the TRX Home Suspension Trainer Kit offers an excellent solution. This versatile system enables you to perform a wide range of body-weight exercises, targeting muscles across your entire body. By incorporating the TRX Home system into your routine, you can enhance your strength, flexibility, and overall fitness levels conveniently and effectively.
Disclaimer:
The information contained in this article is for educational and informational purposes only and is not intended as a health advice. We would ask you to consult a qualified professional or medical expert to gain additional knowledge before you choose to consume any product or perform any exercise.

