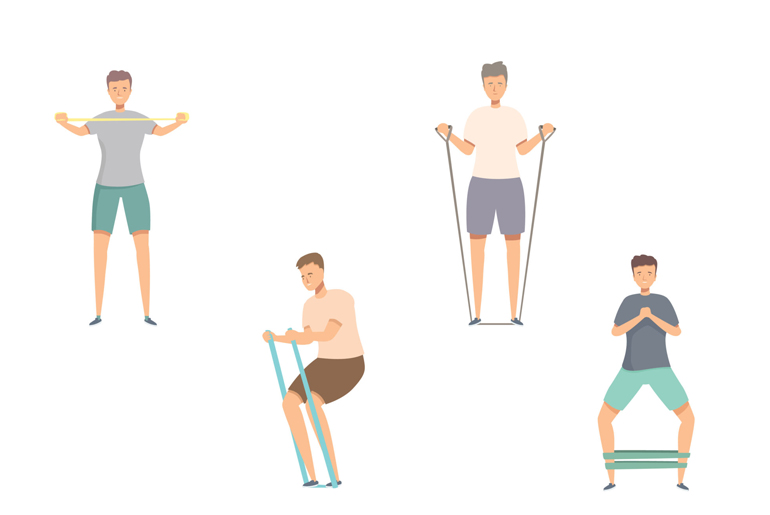
Resistance bands are large elastic bands available in different tension level. A great way to work strength training into your exercise routine. They’re especially good for beginners: They’re more affordable and generally safer than weights.
Resistance bands:
Resistance bands are elastic exercise tools available in various tension levels that help incorporate strength training into your fitness routine. Especially ideal for beginners, these bands are safer and more affordable than traditional weights, with less risk of injury—such as dropping a heavy object. Resistance bands offer adjustable tension, allowing users to modify the difficulty by changing hand placement. They provide lighter resistance at the weakest point of an exercise, making them beginner friendly. Versatile and portable, resistance bands can be used at home or while traveling. Available in multiple styles—including loops, ribbons, and bands with handles—it’s beneficial to have a set with varying resistance levels for a more comprehensive workout.
Guide for Resistance Band Workouts:
For beginners and those new to resistance band workouts, it’s recommended to start with two strength-based sessions per week, lasting around 30 minutes each, ideally on nonconsecutive days.If you’re already incorporating cardio into your routine, you can alternate resistance band workouts on your non-cardio days or combine both on the same day, ideally doing strength training first to avoid fatigue. Those who already follow a strength training program can either add resistance band sessions or substitute them for existing workouts.
Essential Equipment
- Resistance Bands
- Looped bands (great for lower body)
- Flat/ribbon bands (common in rehab or Pilates)
- Bands with handles (useful for upper body moves)
- Choose what feels comfortable and easy to control for your workout style.
- Comfortable, Breathable Clothing
- Sneakers
- Yoga Mat
Safety Tips for Resistance Band Workouts:
1. Start Light and Go Slow: Begin with low-resistance bands—especially if you’re new or returning from an injury. Gradually increase resistance, reps, and workout intensity over time. Avoid diving into high resistance too fast to prevent overuse injuries like tendinitis or bursitis.
2. Master Your Form First: Practice the movement without the band to ensure proper form. Only add resistance once you can perform the exercise safely and comfortably. Example: Can’t squat with a band around your thighs? Do band-free squats first.
3. Secure Your Band Properly: If anchoring the band, use a stable, sturdy point like a door anchor or tree. Avoid anchoring to chairs, tables, or anything that can tip over or move.
4. Protect Your Eyes: Always grip the band firmly and control your range of motion to avoid it snapping back. A snapped band could potentially cause eye injuries, including serious issues like retinal detachment. If a band ever hits your eye and you notice pain, blurred vision, flashes, or floaters—see an ophthalmologist immediately.
5. Inspect Bands Regularly: Look for signs of wear and tear, such as cracks, thinning, or fraying. Worn-out bands are more likely to snap during use—replace them when needed.
6. Get Medical Clearance if Needed: If you have a chronic condition, injury, or recent surgery, consult a healthcare provider before starting resistance training.
Warm Up for Resistance Band Workouts:
Before starting a resistance band workout, it’s important to warm up your body to prepare your muscles and joints for movement. A short, brisk walk is a great way to get your heart rate up, followed by dynamic stretches like squats, lunges, and arm circles to activate your muscles and signal your body that it’s time to exercise. Additionally, incorporating a few minutes of balance training can further enhance your warm-up. Simple exercises such as standing on one leg while holding a surface for support or shifting your weight side to side in a wide stance help engage your neuromuscular system. These balance drills not only improve everyday coordination and movement patterns but also help prevent injuries by keeping you stable during your resistance band workout.
4-Week Resistance Band Workout Plan:
4-Week Resistance Band Workout Plan to help you get started. This plan gradually increases workout intensity and incorporates rest days for recovery. Depending on your fitness level, you can adjust by sticking to two days per week if needed, or progress to three days per week as you build strength.
Week 1: Starting Slow
- Day 1: 30-minute walk or other cardio
- Day 2: Full-body resistance band workout (30 minutes)
- Day 3: 30-minute walk or other cardio
- Day 4: 30-minute walk or other cardio
- Day 5: Full-body resistance band workout (30 minutes)
- Day 6: 30-minute walk or other cardio
- Day 7: Rest (or gentle activity, like an easy walk)
Week 2: Building Consistency
- Day 1: 30-minute walk
- Day 2: Full-body resistance band workout (30 minutes)
- Day 3: 30-minute walk or other cardio
- Day 4: 30-minute walk or other cardio
- Day 5: Full-body resistance band workout (30 minutes)
- Day 6: 30-minute walk or other cardio
- Day 7: Rest (or gentle activity, like an easy walk)
Week 3: Adding a Third Workout Day
- Day 1: 30-minute walk or other cardio
- Day 2: Full-body resistance band workout (30 minutes)
- Day 3: 30-minute walk or other cardio
- Day 4: Full-body resistance band workout (30 minutes)
- Day 5: 30-minute walk or other cardio
- Day 6: Full-body resistance band workout (30 minutes)
- Day 7: Rest (or gentle activity, like an easy walk)
Week 4: Maintaining Consistency
- Day 1: 30-minute walk or other cardio
- Day 2: Full-body resistance band workout (30 minutes)
- Day 3: 30-minute walk or other cardio
- Day 4: Full-body resistance band workout (30 minutes)
- Day 5: 30-minute walk or other cardio
- Day 6: Full-body resistance band workout (30 minutes)
- Day 7: Rest (or gentle activity, like an easy walk)
Example Full-Body Resistance Band Workout (30 Minutes):
- Warm-Up (5 minutes)
- Light cardio (marching in place, arm circles)
- Lower Body (10 minutes)
- Squats (3 sets of 20 reps)
- Reverse Lunges (3 sets of 20 reps per leg)
- Deadlifts (3 sets of 20 reps)
- Upper Body (10 minutes)
- Overhead Triceps Extension (3 sets of 20 reps)
- Bent Over Rows (3 sets of 20 reps)
- Chest Press (3 sets of 20 reps)
- Core (5 minutes)
- Leg Raises (3 sets of 20 reps)
- Banded Mountain Climbers (3 sets of 20 reps)
- Banded Walking Bridge (3 sets of 20 reps)
This plan gives you a balanced mix of strength and cardio while allowing your body ample recovery.
Resistance band workouts are an excellent entry point for anyone looking to incorporate strength training into their routine, especially beginners, though people at all fitness levels can benefit from them. With consistent use, resistance bands can help build muscle and increase strength over time. To maximize results and reduce injury risk, always begin your session with a proper warm-up—such as a brisk walk or dynamic stretching—to prepare your body for the workout ahead.
Disclaimer:
The information contained in this article is for educational and informational purposes only and is not intended as a health advice. We would ask you to consult a qualified professional or medical expert to gain additional knowledge before you choose to consume any product or perform any exercise.


